Web User Interface for Automate
Introduction
Automate Web UI extension provides easy to use approach to monitoring and modifying Automate system and its components. Features:
- Displayed data updated in real time via Websocket
- Responsive design (using Bootstrap CSS & JS library), suitable for mobile and desktop use.
- Optional authentication
- Read-only and read-write modes.
- Read-only mode allows only monitoring (default)
- Read-write mode allows modifying the System by:
- adding new Actuators / Sensors / Programs
- modifying existing Actuators / Sensors / Programs
- Quick editing of user-editable sensors from main views
- HTTP and secured HTTPS servers supported (powered by built in Tornado Web Server)
Main features are illustrated with a few screenshots:
Installation
Install extras:
pip install automate[web]
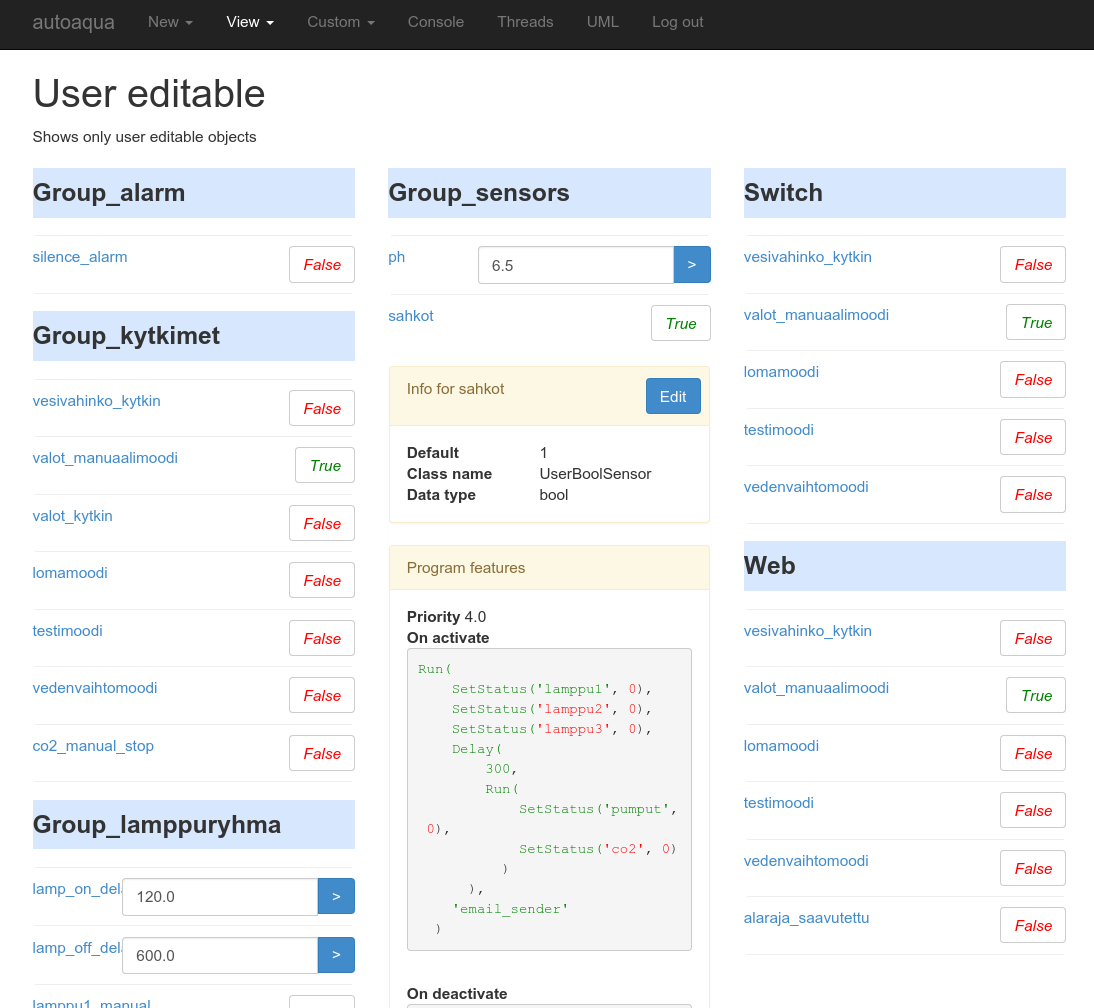
Main view
In main view you can observe actuator and sensor statuses in real time, and also easily access user-editable sensor statuses. Clicking object name will give more details of the selected item as well as ‘edit’ button. (only in read-write mode).
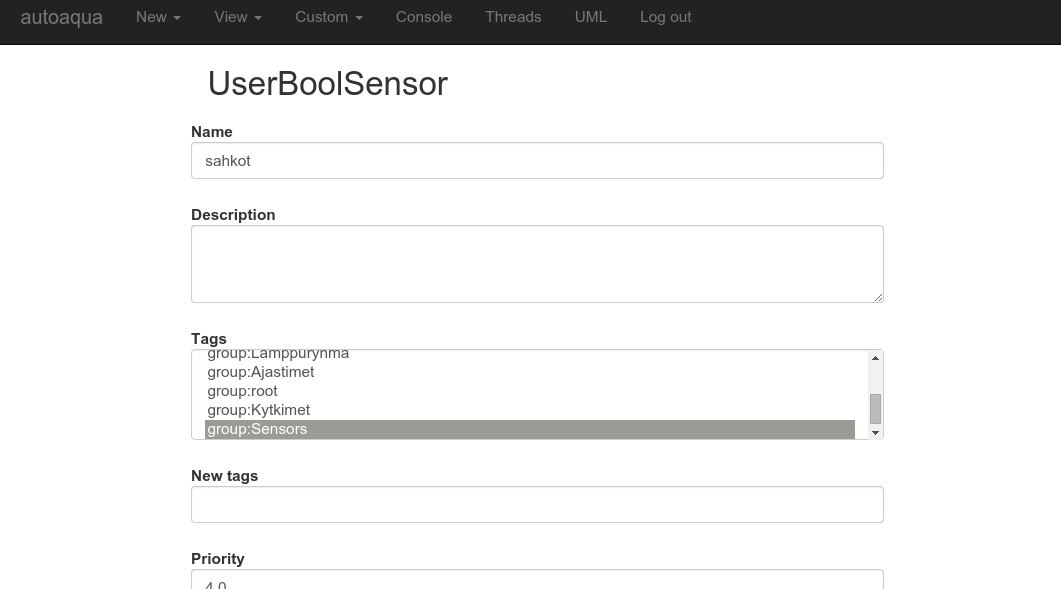
Edit view
In edit view you can edit almost all the attributes of the objects that are in the system. You can also create new ones.
UML view
In UML view you can see nice UML diagram of the whole system. To enable UML diagram, you need to set
up PlantUMLService.

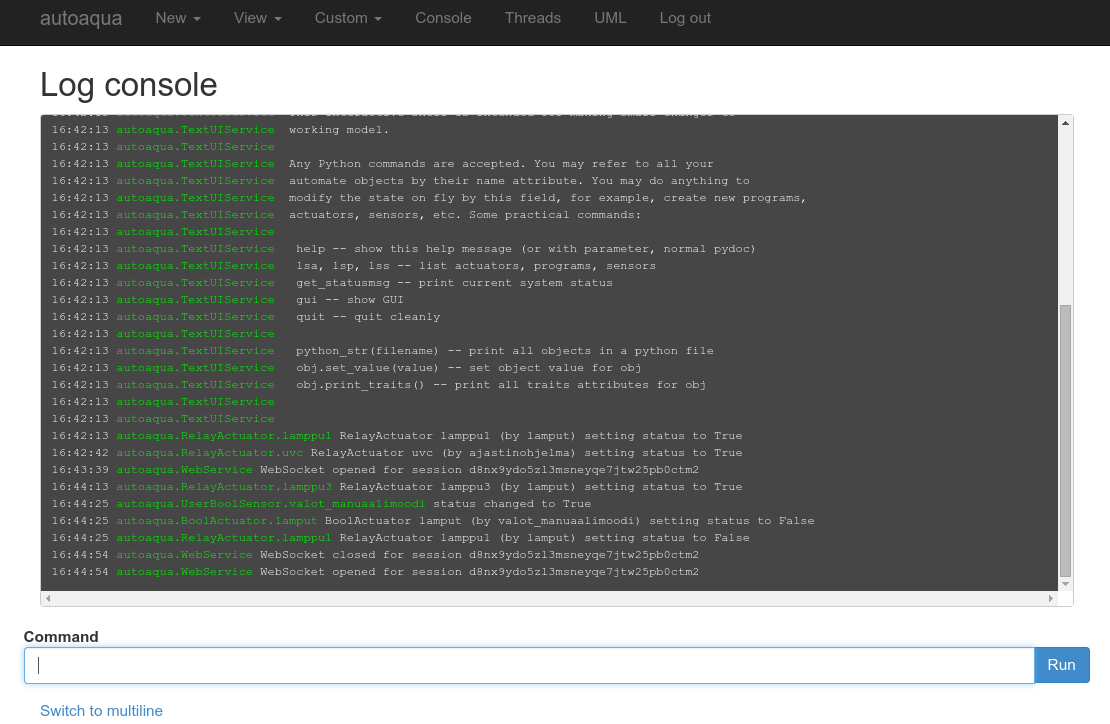
Console view
In console view you can see the log as well as type commands same way as in IPython shell.
Example application using Web UI
This is extended example of the “Hello World” in Automate, that opens two web services, one for port 8085 and another
in 8086. It will go to UML view by default and in “User defined” -view you will see only web_switch.
from automate import *

class MySystem(System):
    # HW swtich connected Raspberry Pi GPIO port 1
    hardware_switch = RpioSensor(port=1)
    # Switch that is controllable, for example, from WEB interface
    web_switch = UserBoolSensor(tags=['user'])
    # Lamp relay that switches lamp on/off, connected to GPIO port 2
    lamp = RpioActuator(port=2)
    # Program that controls the system behaviour
    program = Program(
        active_condition = Or('web_switch', 'hardware_switch'),
        on_activate = SetStatus('lamp', True)
    )

# To view UML diagram, we need to set up PlantUMLService. Here we will use
# plantuml.com online service to render the UML graphics.
plantuml_service = PlantUMLService(url='http://www.plantuml.com/plantuml/svg/')
web_service = WebService(
                    read_only=False,
                    default_view='plantuml',
                    http_port=8085,
                    http_auth = ('myusername', 'mypassword'),
                    user_tags = ['user'],
                    )

# Just to give example of slave feature, let's open another server instance
# at port 8086.
slave = WebService(
                   http_port=8086,
                   slave=True,
                   )

my_system = MySystem(services=[plantuml_service, web_service, slave])
Tip
Try to run the code in your IPython shell by copying & pasting it with cpaste command!
WebService class definition
-
class
automate.extensions.webui.WebService[source]¶ Web User Interface Service for Automate
-
read_only= None¶ Restrict usage to only monitoring statuses (default:
True). If WebService is not in read_only mode, it is possible to run arbitrary Python commands through eval/exec via web browser. This is, of course, a severe security issue. Secure SSL configuration HIGHLY recommended, if not operating inread_onlymode.
-
default_view= None¶ Default view that is displayed when entering the server. Can be the name of any view in views.py
-
show_actuator_details= None¶ Below Actuator row, show active Programs that are controlling Actuator
-
http_port= None¶ HTTP port to listen
-
http_auth= None¶ Authentication for logging into web server. (user,password) pairs in a tuple.
-
websocket_timeout= None¶ Let websocket connection die after
websocket_timeouttime of no ping reply from client.
Tags that are shown in user defined view
-
debug= None¶ Django debugging mode (slower, more info shown when error occurs)
-
custom_pages= None¶ User-defined custom pages as a dictionary of form
{name: template_content}
-
slave= None¶ set to True, if you want to launch multiple servers with same system. Authentication and other settings are then taken from master service. Only web server settings (http host/port) are used from slave.
-
django_settings= None¶ In this dictionary you can define your custom Django settings which will override the default ones
-